– La profondeur de champ
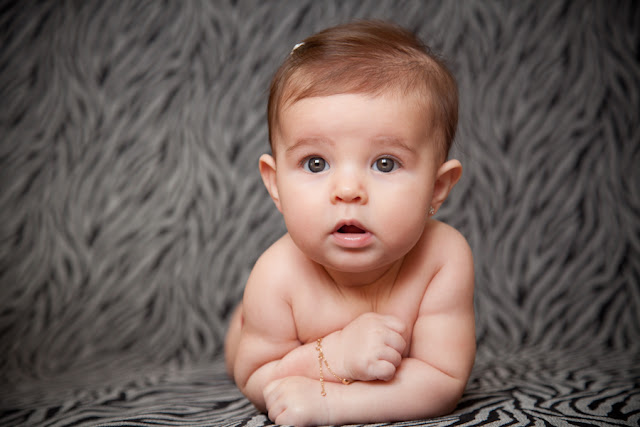
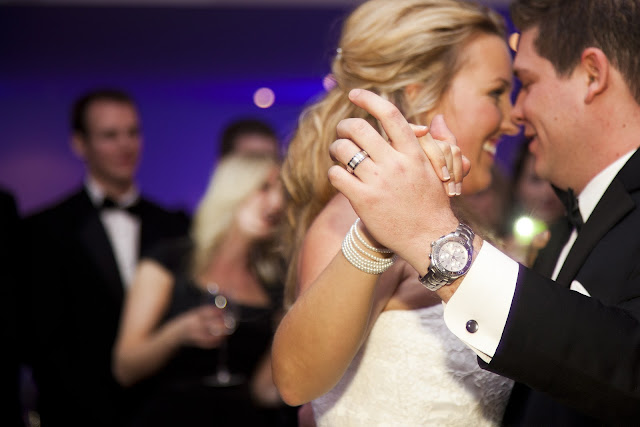
En simplifié, c'est la zone nette d'une image. Lorsqu'on fait un portrait de quelqu'un, nous voulons mettre l'accent sur le visage de la personne, c'est pourquoi on souhaite que l'arrière plan soit flou très rapidement. Si par contre on réalise un paysage, nous voulons que tout soit nette, autant ce qui est près de nous que ce qui se trouve très loin.
– L'obturateur
Lorsqu'on prend une photo, la caméra laisse passer la lumière durant une fraction de seconde par un mini trou qui s'ouvre et se ferme. C'est l'obturateur. Dans le cas d'un portrait comme dans l'exemple précédent, nous voulons un obturateur qui s'ouvre très grand (f 2.8 par exemple), tandis que si l'on fait un paysage, nous voulons un obturateur très petit (f 22).
– La vitesse d'obturation
La vitesse d'obturation c'est la vitesse à laquelle l'obturateur s'ouvre et se referme. À moins d'avoir un trépied sous la main, on essaie de ne pas prendre de photo à moins de 1/60 ème de secondes, sinon, il y a de bonnes chances que la photo soit floue. Si l'on veut, par exemple, réaliser une photo d'un enfant qui joue au soccer, la vitesse d'obturation devra être très rapide de sorte à capter le mouvement sans avoir de flou (1/200 ème de secondes).
– Le Cadrage
Prenons une photo 4x6 et divisons la en 3 sur le sens de la longueur et en 3 sur le sens de la largeur. Cela nous donne 9 rectangles. Essayez de cadrer votre sujet à l'intersection de ces rectangles. C'est une règle de base qui fonctionne bien.
– La lumière
Voici l'une des notions les plus difficile à comprendre en photographie. Pour la simplifier, voici quelques conseils :
Lorsque vous photographiez un sujet en plein soleil, regardez l'ombre qui tombe sur son visage. Si le sujet a de la difficulté à garder les yeux ouverts, il faut le déplacer ! La plupart du temps, le sujet doit avoir le soleil dans le dos et on l'éclaire avec un flash ou tout simplement la lumière naturelle.
Si vous photographiez, par exemple le soir, dans des conditions d'éclairage très sombres, il vous faut soit avoir un trépied (afin de diminuer la vitesse d'obturation et avoir ainsi plus de lumière qui entre dans le capteur), soit utiliser une lumière extérieur (un flash) ou augmenter son ISO.
– l'ISO
C'est la sensibilité du capteur à la lumière. L'ISO peut aller de 100 à 3200 et plus. Lorsqu'on photographie en plein soleil, il y a énormément de lumière donc ISO 100 est tout à fait correct. Lorsqu'on a une faible lumière, il faut augmenter son ISO, mais attention ! Un ISO élèver détériore la qualité de la photo en créant du « bruit ». On n'utilise pas le dernier niveau d'ISO que la caméra permet d'aller.
Avec tous ces conseils, il ne reste plus qu'à jouer avec votre caméra et déterminer comment changer tout ces paramètres. Le meilleur conseil est de pratiquer, pratiquer, pratiquer !
M = mode manuel afin de changer manuellement tous les réglages que je viens de mentionner.
Av = Priorité à l'ouverture. Permet de fixer l'ouverture et le reste s'ajustera selon la lumière.
Tv = priorité à la vitesse d'obturation. Permet de fixer la vitesse choisie, l'obturateur s'ajustera en fonction de la lumière.
* * *
I often get asked to give a "mini-course" on how to take great pictures. Here's what I say to them : photography is an art that is learned and developed over time. If it was to just push a button, this question wouldn't even exist. There are some important things to know if you want to improve the appearance of your photos. Here are a few :
– Depth of field
In short, it's the net area of an image. When taking a portrait, we want to focus on the face of the person, which is why we want the background out of focus very quickly. If we realize a landscape, we want everything to be clear, as much as what's right in front as what's far away.
– The Shutter
When taking a picture, the camera lets light in a split second by a tiny hole that opens and closes. This is the shutter. In the case of a portrait as in the previous example, we want a shutter that opens very large (e.g. f 2.8), while if it's a landscape, we want a very small shutter (e.g. f 22).
– The Shutter Speed
The shutter speed is the speed at which the shutter opens and closes. Unless you have a tripod at hand, we try not to take a picture less than 1/60th of a second, otherwise, there's a good chance that the picture will be blurry. If you want, for example, to make a photo of a child paying soccer, the shutter speed will be very fast in order to capture movement without any blur (1/200th of a second).
– Framing
Take a 4X6 and divide is by 3 lengthwise and by 3 on the width. This gives us nine rectangles. Try to frame your subject at the intersection of these rectangles. This is a rule of thumb and it works well.
– Light
This is one of the most difficult concept to understand in photography. To simplify it, here are some tips :
When shooting a subject in sunlight, look at the shadow that falls on his face. If the subject has difficulty to keep his eyes open, you have to move him! Most of the time, the subject must have the sun in his back and he's illuminated with a flash or just natural light.
If you shoot, for example at night, in very dark lighting conditions, you must either have a tripod (to reduce the shutter speed and have more light entering the sensor) or use an outside light (flash) or increase your ISO.
– ISO
This is the sensor's sensitivity to light. ISO can range from 100 to 3200 and more. When taking a picture in the sun, there's plenty of light, so 100 ISO is quite correct. When in a low light, increase the ISO, but beware! An ISO raise deteriorates the quality of the picture by creating "noise". We don't go to the last level of ISO that the camera lets us go.
With all these tips, you just have to play with your camera and get to know how to change all the settings by yourself. The best advice is to practice, practice, practice!
M = Manual to manually change all the settings I mentioned.
Av = Aperture Priority. Allows you to set the aperture and the rest will adjust depending on the light.
Tv = Shutter Speed Priority. Allows you to set the desired speed, the shutter will adjust depending on the light.


Aucun commentaire:
Enregistrer un commentaire